Ninja Gaiden DS - Wood Amulet
Wood Amulets are used to unlock the "Prize" (beat the game once to unlock) section under the main menu. The more you find the mode items will be unlocked under this section.
What is Netherworld Challenge? Remember the Stone Circle Cove? Once you clear the stage and back to this place, the cleared circle is shinning in yellow, now enter the circle again will bring you to the challenge. Alot of fiends waiting for your visit :)
There are totally 45 of it in the game.
Wood Amulet 1
Normal mode; Netherworld Challenge
Stone Circle Cove bottom right part circle
Wood Amulet 2
Master Kunoichi mode;
Stone Circle Cove botton right part circle
Wood Amulet 3
Chapter 5; Hayabusa Village (South)
Wood Amulet 4
Normal mode; Netherworld Challenge
Stone Circle Cove top left part, the left circle
Wood Amulet 5
Head Ninja mode; Netherworld Challenge
Stone Circle Cove bottom right part circle
Wood Amulet 6
Head Ninja mode; Netherworld Challenge
Stone Circle Cove bottom left part, the left circle
Wood Amulet 7
Head Ninja mode; Netherworld Challenge
Stone Circle Cove top left part, the left circle
Wood Amulet 8
Head Ninja mode; Netherworld Challenge
Stone Circle Cove bottom left part, the right circle
Wood Amulet 9
Chapter 5; Underground Mausoleum
Wood Amulet 10
Chapter 8; Cavern of Ice
Wood Amulet 11
Chapter 5; Forest of Shadow (left from the Village Tunnel exit)
Wood Amulet 12
Master Ninja mode; Netherworld Challenge
Stone Circle Cove bottom right circle
Wood Amulet 13
Master Ninja mode; Netherworld Challenge
Stone Circle Cove bottom left part, left circle
Wood Amulet 14
Chapter 5; Forest of Shadow (South, the water area)
Wood Amulet 15
Normal mode; Netherworld Challenge
Stone Circle Cove top right part, the left circle
Wood Amulet 16
Normal mode; Netherworld Challenge
Stone Circle Cove bottom left part, the left circle
Wood Amulet 17
Head Ninja mode; Netherworld Challenge
Stone Circle Cove top right part, the left circle
Wood Amulet 18
Master Kunoichi mode; Netherworld Challenge
Stone Circle Cove top left part, the left circle
Wood Amulet 19
Chapter 9; Isle of Destiny (bottom left after killing all piranhas)
Wood Amulet 20
Master Kunoichi mode; Netherworld Challenge
Stone Circle Cove bottom left part, the right circle
Wood Amulet 21
Normal mode; Netherworld Challenge
Stone Circle Cove bottom left part, the right circle
Wood Amulet 22
Master Kunoichi mode; Netherworld Challenge
Stone Circle Cove bottom left part, the left circle
Wood Amulet 23
Master Kunoichi mode; Netherworld Challenge
Stone Circle Cove top right part, the right circle
Wood Amulet 24
Normal mode; Netherworld Challenge
Stone Circle Cove top right part, the right circle
Wood Amulet 25
Master Kunoichi mode; Netherworld Challenge
Stone Circle Cove top right part, the left circle
Wood Amulet 26
Master Ninja mode; Netherworld Challenge
Stone Circle Cove top left part, left circle
Wood Amulet 27
Master Ninja mode; Netherworld Challenge
Stone Circle Cove bottom left part, right circle
Wood Amulet 28
Head Ninja mode; Netherworld Challenge
Stone Circle Cove top right part, the right circle
Wood Amulet 29
Master Kunoichi mode; Netherworld Challenge
Stone Circle Cove top left part, the right circle
Wood Amulet 30
Master Ninja mode; Netherworld Challenge
Stone Circle Cove top right part, left circle
Wood Amulet 31
Master Ninja mode; Netherworld Challenge
Stone Circle Cove top right part, right circle
Wood Amulet 32
Chapter 12; Abyssal Underworld (the Southern platform)
Wood Amulet 33
Master Ninja mode; Netherworld Challenge
Stone Circle Cove top left part, right circle
Wood Amulet 34
Chapter 10; The Piramid (outside the Piramid)
Wood Amulet 35
Head Ninja mode; Netherworld Challenge
Stone Circle Cove top left part, the right circle
Wood Amulet 36
Normal mode; Netherworld Challenge
Stone Circle Cove top left part, the right circle
Wood Amulet 37
Chapter 6; Underground Coliseum
Wood Amulet 38
Chapter 4; Hayabusa Village (event)
Wood Amulet 39
Chapter 12; Abyssal Underworld
Wood Amulet 40
Chapter 5; Village Tunnel (Enter Village Tunnel from the waterfall,
it's inside the room covered by the boulder)
Wood Amulet 41
Chapter 4; Underground Sanctuary 2nd map
Wood Amulet 42
Chapter 1; Village Tunnel bottom left
(second level count from bottom, also can be found on Normal mode)
Wood Amulet 43
Chapter 3; Monastery red-blue lights room
Wood Amulet 44
Chapter 7; Cavern of Flame, right from the middle Dragon Statue
(this is not a sealed battle; you must kill all enemies here)
Wood Amulet 45
Collect all 44 Wood Amulet above.
Enter "Prize" section and Muramasa will give you the Wooden Amulet 45.
Ninja Gaiden DS - Walkthrough
Ninja Gaiden Dragon Sword Game Guides Menu
Or FAQ/Walkthrough in text document HERE
---
CHAPTER 1 - "Forest of Shadow"
In the mountains of spring,
there walk a young man and
women. Both have chosen the
path of the Ninja.
Now a quiet shadow
reaches out for them...
#= Forest of Shadows
~Once you gain control of the character, move to the top of the map and read
the tutorial as well while going through the path.
~The first Dragon Statue (save point) found before the tunnel.
~Once you've done, enter the tunnel or you can have more fight in a small
area on the right.
#= Village Tunnel
~There's some optional areas as you can see on the map, nothing special other
than to fight more enemies in those areas.
*NOTE:
I found the Wood Amulet 42 at the bottom left area on Head Ninja mode,
the second level count from the bottom. I believe it's also available
on Normal mode. Listen to something like eagle in in this area, blow
to the microphone and shoot down the flying thing to obtain it.
~Follow the path to the top and you can see another Dragon Statue before the
exit.
#= Forest of Shadows
~Move to left and defeat the enemies. Eventually the boss appears.
~BOSS BATTLE
The boss deal large damage to Momiji, but it is not necessory to win this,
just fight as you can.
CHAPTER 2 - "Hayabusa Village"
The hidden Hayabusa village.
Finally rebuilt after the events
of the Dark Dragon Blade Incident,
a new danger threatens this
isolated settlement...
#= Hayabusa Village
~Make your way to the bottom left area of the map. Get pass the spider web
door, later on you will meet with Muramasa. Defeat all the enemies and then
talk to Muramasa for the Art of the Inferno.
~Back to the spider web door and use the Art of the Inferno fire ball to burn
down the spider web.
~Start from now you would get Red Essence as you defeat the enemies.
Red Essence is to refill your Ki which uses for your Ninpo.
~Continue to the room will be sealed, defeat all enemies to obtain
the Obara's Secret.
~Move on to top of the map, defeat somemore enemies on the path. Beware of
the falling boulder which can give you lot of damage, however the blouders
fall on the same route, so make sure you stay on the "untouchable" position
while shooting the enemy archers.
~Use the next the Dragon Statue. Following area you will face lot of enemies,
kill them and move left. There will be another Dragon Statue before the boss.
~BOSS BATTLE
Stay abit left from the boss, that's mean the boss is now on your right.
If you get it right, keep slashing it by just using the normal attack and
the boss will trying to hit you but it will always fail. Simply defeat the
boss by doing this as the boss is on the ground.
CHAPTER 3 - "Monastery Illusion"
An imprisoned Momiji.
Ryu finds himself in the Forest
of Shadows, looking for any
clues as to her whereabouts...
#= Shadow of Forest
~Defeat all enemies at the beginning. Roll close to the archers and kill them
first since they're quite annoying.
~Back to the Village Tunnel.
#= Village Tunnel
~Head to right where the Dragon Statue and the spider web are. Burn down the
spider web with Art of the Inferno.
~Go right and jump up the cliff to return the village.
#= Hayabusa Village
~Go find Muramasa in the middle part of the map.
~Muramasa is sleeping, use the stylus touch him once and blow the microphone
to awake him. Talk to him for the Art of the Inazuma. You can also purchase
items from Muramasa, recommend get the Jewel of Spirit Smith first.
#= Monastery
~Defeat all enemies to unseal the door.
~A Dragon Statue can be found in the main hall. Take the right door in the
main hall since the front gate is locked.
~Move through the passage to the right. Lot of enemies appear here, but not
necessory to fight.
~Go upstairs, then to left until the end. You will eventually reach to top
left corner of the map.
~In the last room, use Shuriken to shoot all three lights when they turn to
blue. If you shoot the red light, some enemies will be spawned.
~Once you've unlocked the main gate, try listen to the eagle voice inside
the three red-blue lights room. Trigger it on the right and shoot it down
for Wood Amulet 43 (I got it on Head Ninja mode, should also available on
Normal mode).
~Afterwards, head back to previous area. Make sure use the Dragon Statue on
the balcony because you will face some strong enemies.
~When you reach to the stairs, you have to defeat all enemies to unseal the
area. Don't just slash like fighting with other fiends, this type is stronger.
Try use more jump and slash attack (slide up and slide horizontal or down),
and not staying at the same position too long. If you choose to use Ninpo,
Art of the Inferno is recommended for this type of fiends.
~Afterwards, back down to the main hall. Use the Dragon Statue to save and
recover, then head up for more fights.
~Defeat all enemies that appear. Again, use more jump attacks for the beast
type enemies. Later on will face the boss.
~BOSS BATTLE
Slow movement boss. As its hands raise up simply dodge its attack with roll.
Charge the Ultimate Technique from a distanse, when the boss comes closer
release it to deal a large damage, if you hit right on its head, you will
stun it for a while.
CHAPTER 4 - "Solemn Sanctuary"
A mysterious stone, and the
illusion of the Monastery.
Now, the ancient Greater Fiend,
Ishtaros, has revealed her
presence.
A massive conspiracy slowly
begins to unfold...
#= Monastery
~Stand on the light to move next location.
#= Stone Circle Cove
~Here you can see a Dragon Statue at the starting point.
~Head up to top right area then return bottom, the circle near the
Dragon Statue will glow. Take it warp back to the village.
#= Hayabusa Village
~Speak with Denroku to learn about the Sea Swallow. After that, shout or blow
the microphone when you hear something like eagle voice, then shoot it with
Shuriken when it appears. Once you done, find the Wood Amulet 38 at the top
right corner.
~As Denroku mention, you may hear this in the battlefield after the fighting,
so pay attention on this voice to collect more Wood Amulets. This item is to
unlock the gallery (image/scene/diary) in the "Prize" section after completed
the game once. And there's total 45 Wood Amulet in the game.
~Next step, go down and find Muramasa, talk to him to trigger a scene.
Buy the Lives of the Thousand Gods before you go, if you have enough gold
for other items, just get it.
~Now return to Stone Circle Cove.
#= Stone Circle Cove
~Take the dark red stone circle to the next area.
#= Underground Sanctuary - 1st map
~Move to the top right of the map. Enemies are not hard but make dodge the
spikes pop up through the path.
~Use the Dragon Statue before you jump down to the next area.
#= Underground Sanctuary - 2nd map
~In the passage, carefully roll pass the spikes, ignore the eyeball enemies
if you like. Jump down to the lower area.
~Here you can find a Dragon Statue on the right and the Wood Amulet 41 before
the Dragon Statue room.
~Back to where you down from, burn down the spider web on the left for the
new path.
~T junction area, go either left or right window (just move to the window
and Ryu will jump in). Light up the fire panel at both left and right side
with Art of the Inferno. In the passage of the two fire panels can find a
Dragon Statue, which placed here for you the restore Ki after using the
Art of the Inferno.
~Afterwards, the main door in the T junction would be unlocked. Now use the
Dragon Statue and prepare for the boss fight.
~BOSS BATTLE
Keep attacking from the back. When it goes further, catch it up and continue
slashing from the back. Once you hurt it, it will fall down for a short while,
now recommend make a full charge of your Ultimate Technique to deal a maximum
damage. Needless to say, slash it somemore before it wakes up. Repeat the same
moves to finish it off.
CHAPTER 5 - "Legendary Fiends"
The Dark Dragonstones.
Ryu has no choice but to go
where they guide him.
What awaits him on this
perilous journey?
The paths to Momiji has never
seemed longer...
#= Hayabusa Village
~After the beginning scene, head back to bottom right of the map.
~Before you jump into the well, you can find Wood Amulet 3. But you should
stay abit middle of this area to find that Sea Swallow.
#= Village Tunnel
~The second area needs you to defeat all enemies in order to get pass.
~Head to the right exit to Forest of Shadows.
#= Forest of Shadows
*NOTE:
Out of the tunnel will meet the village ninja. Now if you go right you
will enter the battle, but if you choose left, you can obtain somemore
Wood Amulets. The following steps are pointing you to the Wood Amulets.
~Around the Dragon Statue, you may hear the voice again, it's Wood Amulet 11
(around right of this area).
~Follow the path to the bottom, you can find the Wood Amulet 14 in the water
area before the last section.
~Enter the cave from waterfall to Village Tunnel, then destroy the boulder
with Art of the Inazuma and you can find the Wood Amulet 40 at the inner side.
~After all, head back to the top right area, use the Dragon Statue to save
before entering the fight.
~You will face alot of enemies here, perform a Ninpo to kill partial of them.
Lately, some new enemmies appear who usually attack with magic, and their
magic can chain up tons of damage. For safety, make sure you stop attacking
and evade their magic attack when the blue light shinning on the ground,
return them your counterattack on the suitable chance.
#= Hayabusa Village
~Afterwards, you appear in the village and obtained a bow. Now enter the
stone circle again.
#= Stone Circle Cove
~Take the top left circle for your next destination.
#= Underground Mausoleum
~Run pass or defeat the mummies. You would see a locked gate not far from
the beginning area, leave it for a moment.
~Continue to the top area of the map. On the bridge section, you can ignore
the archers on the side. Guard or roll to dodge their arrows.
~At the end of the bridge, shoot the blue light on the circle to unlock the
gate that you passed just now, then defeat all enemies to unseal the area.
~Head back to previous area, you now can reach to the left area.
~Jump down the tunnel. Head to the left of the map. Shoot the blue light at
the end to unlock the gate near the Dragon Statue.
~Follow the path to upper area. Where you find the boulder can also find the
Wood Amulet 9. Destroy the boulder with Art of the Inazuma.
~Cross the suspension bridge, and the enemies can be ignored if you don't want
to fight more.
~Use the Dragon Statue to heal and save, because the boss is waiting inside
the hall.
~BOSS BATTLE
At the beginning, shoot the boss with your ranged weapon. His move can be
dodged easily with roll, make sure you catch the right timing as his raises
his arms. Once the boss gets enough of damage, he'll fall and it's the best
time to deal more damage to him. Don't bother with charging Ultimate Technique
since normal attacks are good enough for that. And Art of the Inazuma is
strongly recommended for this fight.
CHAPTER 6 - "Mortal Enemy"
The Fiends, brought back to
life in the Empire of Vigoor.
Was this foul deed the work
of the Dark Dragonstones?
Ryu hears a familiar voice,
one that he may never forget...
#= Hayabusa Village
~Start by the speaking with Muramasa in the village. And a new Ninpo namely
The Art of the Hurricane is now available, but I still recommend buy the
Jewel of the Spirit Smith ahead if your gold is not that much. And if you
have not purchased the scroll for the Flying Swallow combo yet, make sure you
buy it as well.
~Once you've done, head North to the Stone Circle Cove through the shinning
stone circle.
#= Stone Circle Cove
~A new circle appears, use it to warp to your next destination.
#= Underground Coliseum
~Run up the path until the Dragon Statue.
~Take the left path. The next area branches to three ways, and one of
them is locked. Just continue to the left until the last room, kill all the
enemies in the last room to unlock the room in the three ways section.
~Now back to the three ways section, head to the top room should see a blue
torch inside. Die out the torch by blowing the microphone.
~Then, head to the bottom room (Hexagon) which contains lost of enemies. Kill
all enemies to spawn the Sea Swallow, shoot it down for the Wood Amulet 37.
~Now take the right path from the Dragon Statue, blow out the blue torch in
the last room as how you did before. The door in the Dragon Statue room should
be opened now.
~Make your way to the next Dragon Statue. Go to the right end area and blow
the fan to unlock the gate of the next room, ignore all the enemies since
the gate will close again.
~BOSS BATTLE
Always remember rub the screen whenever you get caught before the boss hurt
you more. Flying Swallow is quite useful and easy confuses the boss direction,
try use it as your primary attack for this fight. And don't forget your Ninpo
as well. Personally, I used Art of the Hurricane and it does alot of damage
for this boss.
CHAPTER 7 - "Cavern of Flame"
The Greater Fiend Doku,
he who attacked the village
and took the life of Kureha.
The fearsome power of
the Dark Dragonstones
reinvigorated another of
Ryu's adversaries.
Yet the stones continue to
pulse and resonate. Another
Fiend of immense evil lies
in wait...
#= Hayabusa Village
~After the event with Muramasa, go to the Stone Circle Cove.
#= Stone Circle Cove
~Enter the new circle warp.
#= Cavern of Flame
~Follow the one path here and roll pass the lava on the way.
~Head left from the Dragon Statue, shoot down the circle when they turn blue.
Be slow, because if you shot the red light, you will have to defeat alot of
enemies.
~Afterwards, take the new path that's unlocked. Just one screen to the right
from the middle Dragon Statue will face some enemies, they not necessory to
fight, however if you beat all of them, you can hear the Sea Swallow which
would give you the Wood Amulet 44.
~Next, kill all the enemies in the sealed area before you can continue.
Try use more flying attack/swallows since the enemies are quite aggressive,
also becareful the fire spot which can probably bother your fight.
~Use the Dragon Statue in the next area.
~Jump up to the top floor and you will find another Dragon Statue. The boss
is waiting in the next room.
~BOSS BATTLE
It's not as stronge as its look, just expect its attacks are quite fast
especially the bite move. The easiest way to dodge make sure your position
is not in the front of the boss, so keep on running or roll to the side
before you do any attacks. The great chance to attack is right after you
dodge its bite attack, and remember to rub the screen if you're bitten.
Once you've given the boss enough of damage, it will be stunned for a
moment, allows you to hit it more.
CHAPTER 8 - "Cavern of Ice"
The Dragonstones continue
to resonate.
Sometimes they lead Ryu to
a forgotten monastery --
other times they lead to the
flames of the abyss.
Ryu treads a dark and terrible
path. Yet the Dragonstones
relentlessly guide him to an
unknown fate...
#= Hayabusa Village
~Likewise, enter the Stone Circle Cove through the warp point at North.
#= Stone Circle Cove
~The new circle appears at top right. Take it to the Cavern of Ice.
#= Cavern of Ice
~Jump to upper area. Move to the right path from the junction since the
other path is blocking by the fire.
~After some fights, jump into the hole at the right area.
~Destroy the ice block to obtain the Art of the Ice Storm. Move right to the
Dragon Statue room, and here you can find the Wood Amulet 10.
~Go back to where you came, dodge the falling ices on the way.
~Use the Art of the Ice Storm Ninpo to unseal the fire to the way leads to top.
~Have some more fights on the way to the top of the map.
~Use the Dragon Statue to heal and save before you jump into the hole at
the top of the map.
~BOSS BATTLE
An Ice Dragon, similar like the boss you fought in the previous chapter, and
this is even easier. Once the boss appears from the river, shoot it with your
bow 3 or 4 time, then you should pay attention on its possible attacks, but
sometimes it'll just back into the river again. Thing to remember is when
the boss move backward, that means something is falling from your top,
needless to say, you should dodge it by running around. And the other thing
is the ice ball normally would come three in a row, so it's better dodge all
its ice balls before continue your shots.
CHAPTER 9 - "Isle of Destiny"
An infamous Greater Fiend
appears before the increasingly
impatient Obaba, head of the
Black Spider Clan.
The Fiends, and the
Black Spider Clan.
Their true motives remain
shrouded in mystery...
#= Hayabusa Village
~Upgrade your Dragon Sword to max level if possible. Also you will obtain the
Explosive Arrows before you go.
~Go to the Stone Circle Cove.
#= Stone Circle Cove
~Take the new stone circle warp to the next destination.
#= Sea of Trees
~Just a long and straight road to the North. Try to ignore the enemies since
some hidden archers that you couldn't kill are bothering.
~Further area, spend a little spare time to avoid the worthless damage from
the falling boulders.
#= Isle of Destiny
~Begin this location at the beach area, and you will face a new enemy, piranha?
This kind of enemies are VERY annoying, try kill them with Flying Swallow since
this move attack larger area. Don't use too many combo on these enemies, if you
miss-hit one of them in your combo, you'll probably get bite alot.
~When you reach to the last area of the beach part (bottom left of the map),
make sure you kill all the piranhas to trigger the Sea Swallow for the
Wood Amulet 19.
~Next up, before you can enter the building, you have to fight with some
enemies in the sealed area. Some of those enemies can damage Ryu by grab and
throw him and this move cannot be blocked. Be sure use more Flying Swallow
for this battle to avoid this move.
~Follow the path up to inner area of the building.
~Another worst part is the bridge after the Dragon Statue. You could fall over
the bridge during the fight, and you need to start over again if you did that.
One easier way is may youself stay at one of the ends on the bridge and keep
shooting your foes with the Explosive Arrows.
~Reach to the top right area of the map, burn down the spider web with any
fire type Ninpo, and then save the game on the Dragon Statue. Enter the room
to challenge the next boss.
~BOSS BATTLE
Suprisingly easy boss. Most of her moves mainly attack her front direction,
means you can simply evade them by running or roll to the side. Her most
powerful skill is her crow attack, she will send three crows in a row to hit
you, just make sure you roll at the right timing as you see the crows dashing
onward to Ryu. If you're in a distance, don't bother with getting closer and
slash the boss, just keep shooting with your Explosive Arrows, and don't forget
your Ninpo can make this easy (recommend Art of the Hurricane).
CHAPTER 10 = "The Ends of Hell"
There are only two Dark
Dragonstones remaining for
Ryu to find.
He steps into the strange
world before him, believing
it to be the only way leading
to Momiji...
#= Isle of Destiny
~Obtain the Art of the Piercing Viod at the beginning, then take the warp
point in the middle to next location.
#= The Piramid
~Use the Dragon Statue to save.
~Once you step into the next area, you will be sealed and need to kill all
foes that appear here. Afterwards, trigger the Sea Swallow and hit it for
Wood Amulet 34.
~Enter the Piramid. Blow all four fans after the first staircase to open
the wall. Get pass the second staircase and then jump up quickly because
there are some spikes on the ground.
~Next up, you will reach to the room with three blue flames stoves. Blow off
all three blue flames on the stoves and then use the Art of Inferno to light
up all three stoves.
~Reach to the upper room, shoot down six circles when they turn blue, then
the path leads to left would be unlocked. Use the Dragon Statue in the passage.
~Last room, use the Art of the Piercing Viod power on the basin. You will face
some enemies before the boss appear.
~BOSS BATTLE
Forget about any moves you have, keep using Flying Swallow (jump and slide
horizonal) or Cicada (jump and slide vertical) as you main attack, because
this boss' moves are fast and powerful, however you can dodge all those moves
by jumping and slashing. Sometimes if you get your Flying Swallow blocked,
perform a Cicada before you land on the ground. Also the boss could be stunned
when you chain him enough, perhaps you could perform an Ultimate Technique
at this moment.
CHAPTER 11 - "Underworld Gate"
One Dragonstone remains
Guided by Dark
Dragonstones, at long
last Ryu finds himself
in front of Momiji...
#= Hayabusa Village/Stone Circle Cove
~Try buy all the remaining items as you can. Go Stone Circle Cove and take
the new shiny circle.
#= Underworld Gate
~Since the road is small, you can try Explosive Arrows for the common enemies.
~Continue you way until the cliff, jump up as soon as you reach otherwise
the piranhas stay a chance to bite you.
~Battle with a mini boss at upper area. His moves are quite powerful but very
easy to be dodged.
~Go until to right area of the map, use the Dragon Statue before the boss.
~BOSS BATTLE
Normally female bosses in the action game are tougher than most other bosses,
this is another proof. The easiest way to attack this boss without taking
heavy damage is right after she uses the ray attack. The best tactic is
roll circling the boss, and don't stay too far from her otherwise she would
use the dash kick. By doing so, the boss will trying to face the direction
on Ryu, sometimes you may perform a slash when you roll to her back. Once
she does the ray attack, you are probably at her side, now slash her 3 or 4
times from the side, don't slash too much or you would be countered!! Keep
rolling circling her until she perform the next ray attack. Do remember use
Ninpo to deal better damage so you can end this fight earlier.
CHAPTER 12 - "Abyssal Underworld"
Kureha and Momiji
The Eye of the Dragon.
Ryu is infused with the ancestral
powers of the Dragons by these
two shrine-maidens.
Now he descends into the abyss
of the Fiend Realm in search
of his true enemy.
His struggle nears its end...
#= Underworld Gate
~Move into the light to next section.
#= Abyssal Underworld
~Blow the sleeping Muramasa to buy something. Run down to path after the
Dragon Statue.
~In the first corner, defeat some big blade foes to unseal the path.
You may hear the Sea Swallow after defeating the enemies, trigger it and
hit it for the Wood Amulet 39.
~Continue down the path will encounter some piranhas, so beware.
~Later on, a new enemy appears in the next seal. Recommend attack this enemy
with Flying Swallow.
~In the South or bottom left part of the map where you fight only the
flying enemies, you can find another Sea Swallow. Blow the micophone and
hit it for Wood Amulet 32. In case if it didn't voice up, exit and re-enter
the area.
~Use the Dragon Status before the last area.
~BOSS BATTLE
Looks like this boss is just a minor role. This is a ranged battle. simply
shoot it with Explosive Arrows continuously until it sends you the skulls,
roll left and right to evade as the skulls come closer. Other than this,
it would jump toward your area and bite, just do like how you evade its
skulls, rub the screen if you get caught. Basically we won't have much
trouble on this fight since this boss' moves are too weak. The most
effective Ninpo is Art of the Ice Storm, but make sure you shoot its head.
CHAPTER 13 - "Edge of Darkness"
Following the ultimate form
of the Dark Dragonstones,
Ryu falls deeper into the abyss.
His final battle awaits.
#= Edge of Darkness
~BOSS BATTLE
Use Flying Swallow when the boss is flying, just do one hit if the distance
is too far because you only need to get closer. Try the Flying Swallow combo
when she's near. Once you hit her right spot she would fall, giving you a
chance to slashing more. Once she's up, comtinue chasing her with the same
tactic, keep her busy and this could reduce her chance of performing the
yellow lighty move, which is hard to dodge.
~FINAL BOSS
A big dragon always flying, shoot it with Explosive Arrow from the far as
possible (further until you can clearly see its head), this could avoid him
from using the stomp attack. TO evade the breath from the boss, you can judge
by hearing the voice or the charging light from its mouth, hold any button to
get it ready, once the voice is stop or the light disappears, quickly tap the
screen to roll.
When the boss has fallen, you have to be prepared to dodge as well, but
needless to say, you should take this chance to slash it as much as possible.
What would the boss do are:
1. If attack from its left/middle, the boss will shoot out the laser.
Reverse Wind/roll to left is easier!
2. If attack from its right or left, the boss will counter you with its
big arm. Perform a Reverse Wind/roll as you see it raises its arm!
The last thing must know is during the final attack. What is going to
happen if you just move forward and do your final slash? You will die.
The boss is actually prepared an instant death attack for you when you
try to kill it. So, run close to the boss and be ready to dodge its death
attack, and once you see its head starts moving, immediately perform a
Reverse Wind (roll). After that only give it the final slash.
That's all, now you've beaten the game, hope you enjoy the ending
and new difficulty level.
END
Back to Game Guides Menu
Ninja Gaiden DS - character data
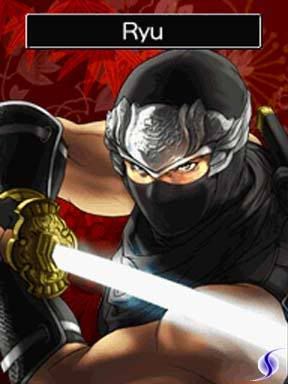 --- | Ryu Heir to the Dragon Lineage and young Master of the Hayabusa Clan. After the near-destruction of the Hayabusa Village in the Black Dragon Blade Incident, he helped rebuild and now lives alongside the Ninjas who survived the tragedy. |
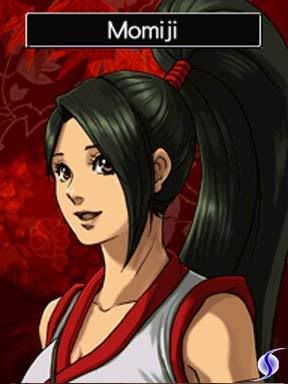 --- | Momiji A female Ninja who trains with Ryu every day in the Hayabusa Village. As the sister of Kureha, who was killed by the Fiends, Momiji is the last of the Dragon Lineage shrine- maidens. |
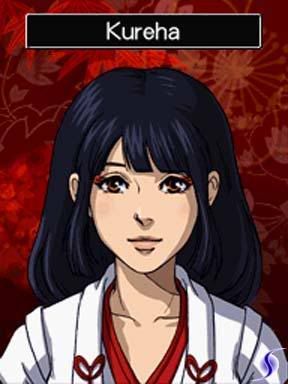 --- | Kureha A Dragon Lineage shrine- maiden who served the shrine inside Hayabusa Village. She grew up alongside Ryu, but tragically lost her life in Doku's attack during the Dark Dragon Blade Incident. As protector of the Eye of the Dragon, she was loved by the people of the village. |
 --- | Muramasa An old man who runs a weapon and item shop. He is an expert in all tools, weapon, and magic from both East and West. He supported Ryu during the Dark Dragon Blade Incident. From time to time, he stops in at the Hayabusa Village. |
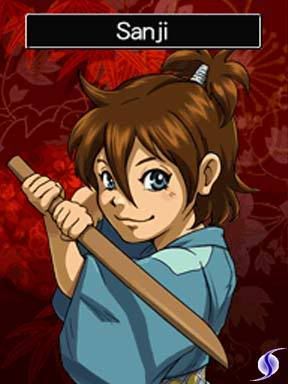 --- | Sanji Lost his parents in the destruction of the Hayabusa Village during the Dark Dragon Blade Incident. The strength in his eyes reminds many of Ryu as a boy. Even at his young age, Sanji is a master swordman, able to wield a sword in each hand. |
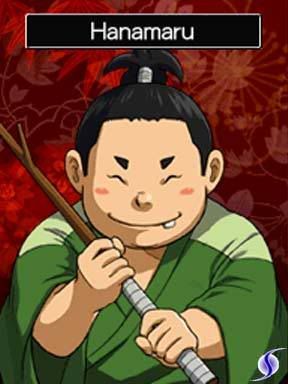 --- | Hanamaru A young boy of the Hayabusa Village, he is quite good with his hands despite his plump appearance. Sometimes happy, sometimes a crybaby, Hanamaru always keeps the village lively. He has a crush on Sakura, whom he follows around incessantly. |
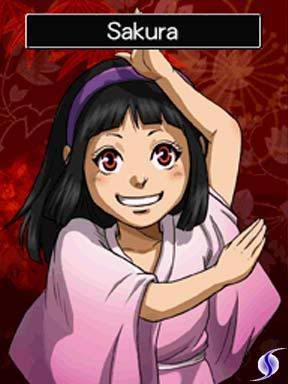 --- | Sakura A young girl who dreams of becoming a Ninja apprentice like Momiji. She always looks at Ryu with eyes full of adoration. Sakura has a tendency to want to act older than she actually is. |
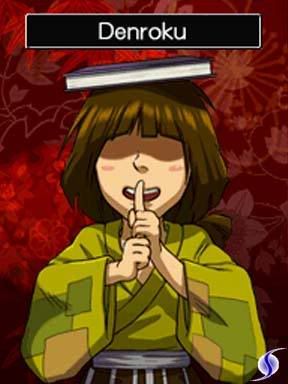 --- | Denroku A scholar of the Ninja Arts, it isn't uncommon to find him with a book in each hand. Even the adults in the village acknowledge his intelligence, which he uses to assist Ryu. Denroku's a poor swordman, but he wants to be of help. |
 --- | Genjiro A born and bred Ninja from the Hayabusa Village, his vast experience and wisdom is a great asset to Ryu. He has survived many a bloody battle alongside Ryu's father Joe Hayabusa. |
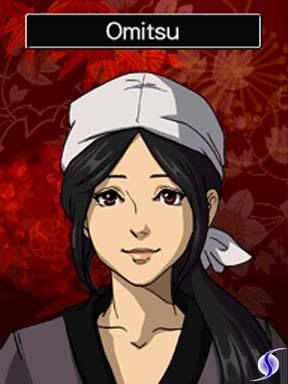 --- | Omitsu A kind-hearted women who watches over the children of the village. Her skill with the bow is legendary. In her youth, she known far and wide as "Omitsu the Sharpshooter." |
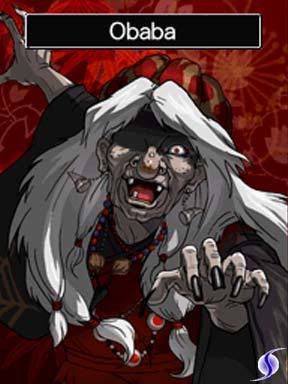 --- | Obaba A sorceress who leads the Black Spider Ninja Clan in spite of her advanced age of more than a hundred. Aided by the Dark Dragon- stones, she is a wizened old woman capable of using all manners of fearsome magic and incantations. |
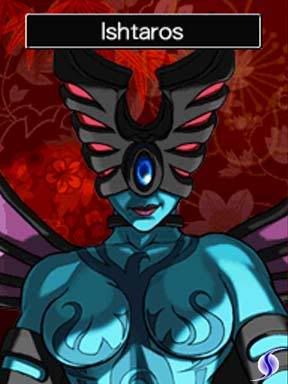 --- | Ishtaros The Ancient Greater Fiend of annihilation, she is deeply connected to the Vigoor Empire that Ryu toppled during the recent Dark Dragon Blade Incident. |
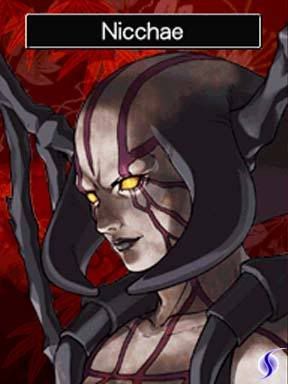 --- | Nicchae The Ancient Greater Fiend of death and destruction. She and Ishtaros are thought to be twin Fiend sisters. |
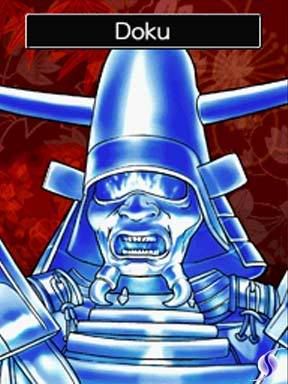 --- | Doku A Great Fiend of the Vigoor Empire, he was the one who destroyed the Hayabusa Village, instigating the Dark Dragon Blade Incident. Althrough defeated twice by Ryu, he has once again returned to life as an evil spirit hellbent on revenge. |
 --- | Holy Vigoor Emperor The Supreme Ruler of the Vigoor Empire and the mastermind behind the Dark Dragon Blade Incident. He attempted to become the ultimate force of evil by obtaining the malevolent Dark Dragon Blade. With this goal he sent Doku to attack the Hayabusa Village. |
FFCC: Ring of Fates guides / walkthrough
FFCC: Ring of Fates - Mini Tips
Some tips of the game discovered from my gameplay and some researches.
Moogle's items storage
You will get some items from the Moogle when you lift it. Actually those items are the items that you didn't pick up during the game.
The best part is:
Story Mode/Multiplayer share the same moogle, which means that if you already have a lv.99 character in multiplayer/story mode, you can farm as that character, but don't pick up the loot. Then send your new char to a moogle and pick up all the ultimate scrolls/ingredients. The only draw back is that you don't know what items are dropped, so it could take a bit of time to gather up the necessary ingredient to synth weapon/armor. But the items you pull out from your inventory will not be picked by the Moogle.
Credit: beow2k5
Stack items as Stairs. Jump to higher place without using Selkie
Part 8 - ???/Hades where the players usually stuck for awhile
Ultima Magic
FFCC: Ring of Fates - Boss battle 1-7
Boss 1
Boss 2
Boss 3
Boss 4
Boss 5
Boss 6
Boss 7
FFCC: Ring of Fates - Boss battle 8-13
Boss 8
Boss 9
Boss 10
Boss 11
Boss 12
Final Boss
(sorry for the video couldn't play well)
FFCC: Ring of Fates - Secret Dungeon and Boss
Secret Boss - Giant Crab
FFCC: Ring of Fates - Elemental Mixer
max mixing slotw will increase.
Here's the full elementals mix list.
| Result | Elemental needed |
| Fire Magicite | Red Elemental x2 |
| Blizzard Magicite | Blue Elemental x2 |
| Thunder Magicite | Yellow Elemental x2 |
| Cure Magicite | Green Elemental x2 |
| Clear Magicite | Blue Elemental x1, Yellow Elemental x1, Green Elemental x1 |
| Raise Magicite | Red Elemental x1, Yellow Elemental x1, Green Elemental x1 |
| White Elemental | Red Elemental x1, Blue Elemental x1, Yellow Elemental x1 |
| Black Elemental | Red Elemental x1, Blue Elemental x1, Green Elemental x1 |
| Material 1 | White Elemental x1, Black Elemental x1, Dark Matter |
| Material 2 | Green Elemental x1, White Elemental x1, Black Elemental x1, Dark Matter x1 |
| Material 3 | White Elemental x1, Black Elemental x1, Clear Magicite x1, Raise Magicite x1, Dark Matter x1 |
| Dark Matter | Any 2 elementals not in the list. Or, while mixing anything, get the first green dot appears (top left on the touch screen), after that keep the mix status at the blue part. When 3 red dots appear instead of greend dots, you will get Dark Matter. |
Other than elementals, Lilty can mix the magicite to cast spells as well. The way to make it is exactly like how you combine the magic to cast the different spells.
| Result | Magicite needed |
| Fira | Fire + Fire |
| Firaga | Fire + Fire + Fire |
| Firaja | Fire + Fire + Fire + Fire |
| Blizzara | Blizzard + Blizzard |
| Blizzaga | Blizzard + Blizzard + Blizzard |
| Blizzaja | Blizzard + Blizzard + Blizzard + Blizzard |
| Thundara | Thunder + Thunder |
| Thundaga | Thunder + Thunder + Thunder |
| Thundaja | Thunder + Thunder + Thunder + Thunder |
| Cura | Cure + Cure |
| Curaga | Cure + Cure + Cure |
| Curaja | Cure + Cure + Cure + Cure |
| Araise | Raise + Raise |
| Cleara | Clear + Clear |
| Clearaga | Clear + Clear + Clear |
| Clearaja | Clear + Clear + Clear + Clear |
| Barrier | Fire + Clear |
| Slow | Blizzard + Clear |
| Haste | Thunder + Clear |
| Gravity | Fire + Bllizzard + Thunder |
| Holy | Cure + Raise + Clear |
| Bio | Fire + Blizzard + Cure + Raise |
| Quake | Fire + Thunder + Cure + Clear |
| Meteor | Blizzard + Thunder + Raise +Clear |
| Ultima | Fire + Blizzard + Thunder + Cure + Clear |
FFCC: Ring of Fates - Material List
Credits: Lunar Eclipse, Kyattie, Kem70, Kijiyama, InuSan3o19o
| Material | Sell | Found |
| Ruby | 150 | Order from Recipe Scroll |
| Sapphire | 150 | Order from Recipe Scroll |
| Citrine | 150 | Order from Recipe Scroll |
| Emerald | 150 | Order from Recipe Scroll |
| Amethyst | 150 | Order from Recipe Scroll |
| Onyx | 150 | Order from Recipe Scroll Treasure in Abandoned Town |
| Crystal | 150 | Order from Recipe Scroll Boss in Rera Ciel (Hard) |
| Petite Ruby | 50 | Shop |
| Petite Sapphire | 50 | Shop |
| Petite Citrine | 50 | Shop |
| Petite Emerald | 50 | Shop |
| Petite Amethyst | 50 | Shop |
| Petite Onyx | 50 | Shop |
| Dark Crystal | 50 | Any bosses Crystals with the final boss (Multiplayer only) |
| Copper | 25 | Shop |
| Iron | 50 | Shop Daedalus type enemy |
| Mythril | 100 | Shop Daedalus type enemy |
| Orichalcum | 250 | Order from Recipe Scroll Daedalus type enemy Bosses in Lunar Temple |
| Ultimite | 500 | Chimera type enemy (Hard) Spiked Turtle in Crystal Temple (Hard) Daedalus type enemy in Rera Ciel past (Hard) Treasure in Rera Ciel past (Hard) |
| Meteorite | 500 | Bosses in Lunar Temple Skeleton in Hill Caves (Hard) Chimera in Crystal Temple (Hard) |
| Abyssian | 600 | Order from Recipe Scroll Chimera in Crystal Temple (Hard) Sahagin and Thunder Bomb in Hades (Hard) |
| Chopper Shard | 5 | Shop |
| Iron Shard | 10 | Shop |
| Mythril Shard | 20 | Shop |
| Gold | 150 | Shop |
| Silver | 75 | Shop |
| Garnet | 50 | Shop Spiked Tortoise enemy |
| Diamond | 1000 | Order from Recipe Scroll Goblin in Rera Ciel (Hard) |
| Diamond Shard | 100 | Shop Daedalus type enemy |
| Steel | 125 | Red Skeleton in Hades Bosses in Lunar Temple Boss in Mount Vaal (Hard) |
| Tree Branch | 5 | Shop |
| Oak Branch | 25 | Shop |
| Yew Branch | 250 | Mu in Ravine Forest (Hard) Bat in Crystal Temple (Hard) |
| Material | Sell | Found |
| Silk | 50 | Order from Recipe Scroll |
| Leather | 50 | Order from Recipe Scroll |
| Fine Silk | 250 | Order from Recipe Scroll |
| Fine Leather | 250 | Order from Recipe Scroll |
| Iron Silk | 300 | Order from Recipe Scroll |
| Mythril Silk | 600 | Order from Recipe Scroll |
| Ultima Silk | 1200 | Order from Recipe Scroll |
| Red Stone | 25 | Shop Flan and Bomb type enemy |
| Blue Stone | 25 | Shop Flan and Bomb type enemy |
| Yellow Stone | 25 | Shop Flan and Bomb type enemy |
| Magic Stone | 25 | Bat in Valley of Heroes (Hard) Red Flan in Crystal Temple (Hard) |
| Red Orb | 150 | Order from Recipe Scroll Seedspit in Ravine Forest |
| Blue Orb | 150 | Order from Recipe Scroll Seedspit in Ravine Forest |
| Yellow Orb | 150 | Order from Recipe Scroll Seedspit in Ravine Forest |
| Green Orb | 150 | Order from Recipe Scroll Seedspit in Ravine Forest |
| Dark Orb | 250 | Order from Recipe Scroll Bosses in Lunar Temple |
| Holy Orb | 250 | Order from Recipe Scroll Bosses in Lunar Temple |
| Magic Sphere | 125 | Order from Recipe Scroll |
| Red Fay Dust | 5 | Shop Crowd Bee Lilty's alchemy mixer |
| Blue Fay Dust | 5 | Shop Crowd Bee Lilty's alchemy mixer |
| Green Fay Dust | 5 | Shop Crowd Bee Lilty's alchemy mixer |
| Dark Dust | 5 | Lilty's alchemy mixer Treasure in Rera Ciel past |
| White Dust | 5 | Lilty's alchemy mixer Treasure in Rera Ciel past |
| Seraph Dust | 100 | Order from Recipe Scroll |
| Sulful Dust | 100 | Order from Recipe Scroll Sinners' Island (Hard) |
| Behemoth Dust | 5 | Order from Recipe Scroll |
| Zu Dust | 5 | Order from Recipe Scroll |
| Dragon Dust | 5 | Order from Recipe Scroll |
| Material | Sell | Found |
| Moogle Plant | 5 | Shop Mount Vaal |
| Old Sword | 1000 | Boss in River Belle |
| Phoenix Down | 500 | Bat in Hill Caves (Hard) Gaint Scorpion in Crystal Temple (Hard) |
| Mu Nose | 50 | Mu type enemy |
| Mu Fur | 10 | Shop Mu type enemy |
| Skull | 50 | Skeleton type enemy |
| Bone | 10 | Skeleton type enemy |
| Stained Bone | 50 | Invisible Skeleton type enemy |
| Lizard Scale | 100 | Lizardman type enemy |
| Lizard Crest | 200 | Lizardman type enemy |
| Sahagin Fin | 100 | Sahagin type enemy |
| Stained Fin | 200 | Invisible Sahagin type enemy |
| Bomb's Soul | 25 | Bomb type enemy |
| Odd Angled Eye | 50 | Shop Bat type enemy |
| Honey Acid | 50 | Shop Crowd Bee |
| Flan Goop | 100 | Flan type enemy |
| Tortoise Shell | 25 | Spiked Tortoise enemy |
| Curious Petal | 10 | Seedspit enemy |
| Sturdy Vine | 10 | Mandragora enemy |
| Unknown Seed | 50 | Mandragora enemy |
| Material | Sell | Found |
| Chimera Blood | 250 | Chimera in Sinners' Island or Crystal Temple (Normal) |
| Feline Spirit | 500 | Chimera in Sinners' Island, Crystal Temple, or River Belle (Normal) |
| Scorpion Shell | 250 | Boss in Hill Caves, Giant Scorpion in Crystal Temple |
| Scorpion Eye | 500 | Boss in Hill Caves, Giant Scorpion in Crystal Temple |
| Behemoth Horn | 500 | Boss in Abandoned Town |
| Behemoth Claw | 250 | Boss in Abandoned Town |
| Garuda Feather | 250 | Boss in Mount Vaal |
| Garuda Talon | 125 | Boss in Mount Vaal |
| Carniflower Seed | 250 | Boss in Ravine Forest Mandragora enemy |
| Carniflower Fluid | 125 | Seedspit type enemy Mandragora enemy |
| Ancient Scales | 500 | Boss in Rera Ciel (also in the Rera Ciel past) |
| Executioner Mask | 500 | Boss in Sinners' Island |
| Dragon Horn | 500 | Boss in Sinners' Island (Hard) |
| Dragon Scale | 500 | Boss in Sinners' Island |
| Old Hellish Iron | 250 | Skeleton type enemy Sahagin type enemy |
| Bloodied Rag | 1000 | Boss in Hades (Hard) Boss in Crystal Temple (Hard) |
| Secret Scroll | 1100 | Boss in Crystal Temple |
| Great Memory | 1500 | Final boss |
| Wandering Soul | 1500 | Final boss |
| Giant Crab Shell | 1250 | Boss in River Belle |
| Yellow Feather | 5000 | Chimera in Sinners' Island or Crystal Temple (Hard) Treasure in Sinners' Island (Hard) <- random? Treasure in Crystal Temple (Hard) |
FFCC: Ring of Fates - Ability List
(sort by Story Mode level)
Story = Level of the character to learn the ability in Story Mode.
Multi = Level of the character to learn the ability in Multiplayer.
| Clavat | |||
| Story | Multi | Abilities | Description |
| - | 4 | Charge Attack | Hold A to charge. Release when the weapon starts flashing. |
| - | 8 | Chain 4 | Chain four attacks with successive taps of the attack button! |
| 16 | 12 | Magic Pile 3 | You can pile three target rings! |
| 19 | 18 | Charge Guard | Press R at the first swing or while charging for Charge Attack. |
| 25 | 22 | Guard Counter | An enemy attack while guarding will unleash a counterattack! |
| 31 | 27 | Magic Pile 4 | You can pile four target rings! |
| 36 | 33 | Chain 5 | Chain five attacks with successive taps of the attack button! |
| 39 | 38 | Charge Break | Hold A to charge. Release after two flashes for a Charge Break. |
| 42 | 42 | HP +50 | Max HP +50 |
| 44 | 44 | DEF +50 | Defense +50 |
| 48 | 48 | Ring Lock 2 | You can lock two target rings! |
| 55 | 55 | Resist All +1 | All Resistance +1 |
| 61 | 61 | MAG +50 | Magic Power +50 |
| 65 | 65 | Luck +5 | Luck +5 |
| 69 | 69 | Ring Lock 3 | You can lock three target rings! |
| 75 | 75 | ATK +50 | Attack Power +50 |
| 81 | 81 | DEF +100 | Defense +100 |
| 86 | 86 | HP +100 | Max HP +100 |
| 90 | 90 | Clavat Soul | You can withstand more pain! Enemy attacks are less likely to knock you around! |
| 95 | 95 | Luck +10 | Luck +10 |
| Yuke | |||
| Story | Multi | Abilities | Description |
| 13 | 5 | Magic Pile 3 | You can pile three target rings! |
| 15 | 9 | Charge Attack | Hold A to charge. Release when the weapon starts flashing. |
| 17 | 14 | Charge Guard | Press R at the first swing or while charging for a charge attack! |
| 22 | 20 | Magic Pile 4 | You can pile four target rings! |
| 27 | 24 | Ring Lock 2 | You can lock two target rings! |
| 32 | 28 | Guard Counter | An enemy attack while guarding will unleash a counterattack! |
| 35 | 34 | Magic Pile 5 | You can pile fivetarget rings! |
| 42 | 42 | MAG +50 | Magic Power +50 |
| 45 | 45 | Ring Lock 3 | You can lock three target rings! |
| 49 | 49 | SP +50 | Max SP +50 |
| 52 | 52 | Charge Break | Hold A to charge. Release after two flashes for a Charge Break. |
| 58 | 58 | Ring Lock 4 | You can lock four target rings! |
| 65 | 65 | Luck +5 | Luck +5 |
| 68 | 68 | Fire Master | You can burn most enemies with Fire spell! |
| 73 | 73 | Thunder Master | You can paralyze most enemies with Thunder spell! |
| 78 | 78 | Blizzard Master | You can freeze most enemies with Blizzard spell! |
| 81 | 81 | MAG +100 | Magic Power +100 |
| 87 | 87 | Resist All +3 | All Resistance +3 |
| 90 | 90 | Yuke Soul | Magic walls effect x2 |
| 95 | 95 | Luck +10 | Luck +10 |
| Selkie | |||
| Story | Multi | Abilities | Description |
| 18 | 3 | Charge Attack | Hold A to charge. Release when the weapon starts flashing. |
| 21 | 7 | Charge Guard | Press R at the first swing or while charging for a charge attack! |
| 23 | 17 | Magic Pile 3 | You can pile three target rings! |
| 26 | 13 | 3-Way Shot | You can shoot three arrows at once! |
| 29 | 36 | Guard Counter | An enemy attack while guarding will unleash a counterattack! |
| 34 | 26 | Straight Arrow | Your arrows will go through the enemy! |
| 38 | 32 | Charge Break | Hold A to charge. Release after two flashes for a Charge Break. |
| 42 | 42 | SP +50 | Max SP +50 |
| 46 | 46 | Ring Lock 2 | You can lock two target rings! |
| 50 | 50 | HP +50 | Max HP +50 |
| 53 | 53 | Magic Pile 4 | You can pile four target rings! |
| 57 | 57 | MAG +50 | Magic Power +50 |
| 62 | 62 | 5-Way Shot | You can shoot five arrows in once! |
| 65 | 65 | Luck +5 | Luck +5 |
| 70 | 70 | DEF +50 | Defense +50 |
| 76 | 76 | ATK +50 | Attack Power +50 |
| 81 | 81 | SP +100 | Max SP +100 |
| 85 | 85 | Critical Hits Up | Chance of Critical Hits up. |
| 90 | 90 | Selkie Soul | Chance of Critical Hits up x2. |
| 95 | 95 | Luck +10 | Luck +10 |
| Lilty | |||
| Story | Multi | Abilities | Description |
| - | 6 | Charge Attack | Hold A to charge. Release when the weapon starts flashing. |
| 24 | 11 | 3-Item Alchemy | You can melt three ingredients in the pot! |
| 28 | 16 | Charge Guard | Press R at the first swing or while charging for a charge attack! |
| 30 | 23 | Magic Pile 3 | You can pile three target rings! |
| 33 | 37 | 4-Item Alchemy | You can melt four ingredients in the pot! |
| 37 | 30 | Guard Counter | An enemy attack while guarding will unleash a counterattack! |
| 40 | 43 | Charge Break | Hold A to charge. Release after two flashes for a Charge Break. |
| 42 | 42 | ATK +50 | Attack Power +50 |
| 47 | 47 | Ring Lock 2 | You can lock two target rings! |
| 51 | 51 | DEF +50 | Defense +50 |
| 54 | 54 | Magic Pile 4 | You can pile four target rings! |
| 60 | 60 | 5-Item Alchemy | You can melt five ingredients in the pot! |
| 65 | 65 | Luck +5 | Luck +5 |
| 72 | 72 | Urn Master | You can achieve faster results! |
| 77 | 77 | Chain 2 | Chain two attacks with successive taps of the attack button! |
| 81 | 81 | ATK +100 | Attack Power +100 |
| 84 | 84 | Chain 3 | Chain three attacks with successive taps of the attack button! |
| 88 | 88 | Critical Hits Up | Chance of Critical Hits up. |
| 90 | 90 | Lilty Soul | The third hit in the chain will knock enemy down! |
| 95 | 95 | Luck +10 | Luck +10 |
FF Crystal Chronicles: Ring of Fates for US

STORY
Fraternal twins Yuri and Chelinka live happily with their father in a small village, but their happiness comes to an abrupt end with the arrival of an ancient evil. Now, with his family shattered, Yuri begins to train so that he will be strong enough to fight when the evil returns. Armed only with their determination, courage, and Chelinka's magic crystal, these brave twins set out on their quest to find their lost friends, avenge their family, and heal their world.
FEATURES
- Character designer Toshiyuki Itahana lends the game his trademark art style, combining an adorable cast and colorful world with a heroic storyline from the makers of FINAL FANTASY.
- Players can enjoy a truly cooperative experience with Multiplay Mode, engaging in fast-paced, action-oriented gameplay with up to four players via local wireless connection.
- A catalogue of over 300 items enables players to pick and choose from a variety of equipment and armor to customize a character's appearance and abilities.
- An intuitive control scheme maximizes the capabilities of Nintendo DS, challenging players to coordinate both the command buttons and Touch Screen in battle.
- The North American release contains additional quests not available in the original Japanese version.
---
Devil May Cry 4 - interesting scene collection (4 vids)
Gloria the spy
Gloria's real face!!
When Dante meets Echidna
Secret Ending
click here to the Devil May Cry 4 game guide data section.
---
Devil May Cry 4 - Skill showcase (4 vids)
Nero vs Bael DMD mode
Dante Battle 2 DMD mode
Final Boss DMD mode
Kill 3 Angelos in one hit
New PSP value pack - Matte Bronze
NEW PSP® (PLAYSTATION®PORTABLE) VALUE PACK
MATTE BRONZE INTRODUCED AS A LIMITED OFFER


Tokyo, March 4, 2008 – Sony Computer Entertainment Japan (SCEJ), a division of Sony Computer Entertainment Inc. (SCEI) responsible for business operations in Japan, today announced that it would release “PSP® (PlayStation®Portable) Matte Bronze Value Pack” (PSPJ-20002) on April 24th, 2008, at a recommended retail price of 23,800 yen (including tax), as a limited offer, featuring a new color “Matte Bronze” which will come in a matte finish for the first time for PSP.
“PSP Matte Bronze Value Pack” comprises a new “Matte Bronze” PSP, a pouch, a hand strap, a cloth, a 32MB Memory Stick™ Duo, and a D Terminal AV cable. This product is ideal for those who wish to experience PSP’s high quality entertainment content on TVs in homes.※1
More and more exciting new software titles for PSP are scheduled for release from third party licensees as well as from SCE Worldwide Studios, including “MONSTER HUNTER PORTABLE® 2nd G” (CAPCOM CO.,LTD.), “JIKKYO PAWAFURU PUROYAKYU PORTABLE 3”(Konami Digital Entertainment Co., Ltd.) , “Tales of Rebirth”(NAMCO BANDAI Games Inc.), “echochrome”※2 (SCE WWS) and “STAR OCEAN Second Evolution”(SQUARE ENIX CO., LTD.). ※3
SCEJ will continue to further expand the PSP platform and create a new world of computer entertainment by offering more and more attractive products line-up.
※1 Video from games can be output only when the TV supports progressive mode screen display and D terminal AV input (D2-D5).
※2 The title name is to be confirmed.
※3 In alphabetical order of company name.
“PSP® (PlayStation®Portable) Matte Bronze Value Pack” Product Overview
| Product Name | PSP® (PlayStation®Portable)“Matte Bronze”Value Pack |
| Product code | PSPJ-20002 |
| Release Date | April 24, 2008 (Thu) |
| Recommended Retail Price | 23,800 JP Yen (including tax) |
| Package Included | -PSP “Matte Bronze” (PSP-2000MN) × 1 -AC adaptor x 1 -Battery pack x 1 -Pouch x 1 -Hand strap x 1 -Cloth x 1 -Memory Stick™ Duo (32MB) (PSP-M32) × 1 -D Terminal AV cable (PSP-S170)※ × 1 |
---

